Ever since I created my first batch of strawberry themed amigurumi I've been itching to revisit them because they were so much fun to make. I figured this month would be a great time with Valentine's Day just around the corner. Chocolate covered strawberries are popular around the holiday . . . do you think maybe strawberry covered bunnies and bears will catch on just as well? :)

The first strawberry trio were crocheted out of mohair blend yarn, but this time I used some fluffy chenille yarn.

 To complete the outfit, I gave them coordinating ruffled scarves.
Since strawberries are the theme for this month, I thought I would share with you a simple pattern to crochet a large, juicy strawberry of your own. The strawberry is about 3.5 inches long and 2 inches wide. It's a nice size to use as a pin cushion, which is what I use it for. Or maybe attach a clasp to make it into a keychain.
 Strawberry Amigurumi Crochet Pattern
Use sport weight yarn with a 3.5 hook
Terms:
magic adjustable ring -- see link
sc -- single crochet
st(s) -- stitch (es)
sc2tog -- single crochet decrease
sl st -- slip stitch
ch(s) -- chain(s)
Strawberry:
Round 1: 6 sc into magic adjustable ring, pull tail to close and weave in end witha darning needle (6)
Round 2: 2 sc in each st around (12)
Round 3: 1 sc in each st around (12)
Round 4: *1 sc in one st, 2 sc in next st; repeat from * around (18)
Round 5: 1 sc in each st around (18)
Round 6: *1 sc in next two sts, 2 sc in next st; repeat from * around (24)
Round 7: 1 sc in each st around (24)
Round 8: 1 sc in each st around (24)
Round 9: * 1 sc in next three sts, 2 sc in next st; repeat from * around (30)
Round 10: *1 sc in next four sts, 2 sc in next st; repeat from * around (36)
Round 11: 1 sc in each st around (36)
Round 12: 1 sc in each st around (36)
Round 13: *1 sc in next five sts; 2 sc in next st; repeat from * around (42)
Round 14: 1 sc in each st around (42)
Round 15: *1 sc in next six sts: 2 sc in next st; repeat from * around (48)
Round 16: 1 sc in each st around (48)
Round 17: *1 sc in next four sts, sc2tog; repeat from * around (40)
Round 18: *1 sc in next 3 sts, sc2tog; repeat from * around (32)
Round 19: *1 sc in next 2 sts, sc2tog; repeat from * around (24)
Round 20: *1 sc in one st, sc2tog; repeat from * around (16)
Round 21: *sc2tog; repeat from * around (8). Leave a tail long enough for stitching.
Stuff with fiberfill. Thread tail with darning needle and weave tail in and out of the opening's edge in a running stitch, then pull taught to close opening. Tie off.
Stem & Leaf Top:
Round 1: 6 sc into magic adjustable ring, pull tail to close and weave in end with a darning needle (6)
Round 3: 1 sc in each st around (6)
Round 4: 2 sc in each st around (12)
Round 5: * sl st in next st, ch 6, sl st in second chain from end, 1 sc in next three chs, 1 hdc in next ch, sl st in next st over; repeat from * 6x to form six leaves. Leave a long tail for stitching.
Thread tail with darning needle and stitch stem & leaf to the top of the strawberry. Tie off. Because the leaves tend to curl up, tack down each leaf (I stitch them down with needle and thread, but you can use a dot of fabric or hot glue) to the strawberry's body.
Enjoy!


 These girls are dressed a bit more fanciful . . . going to a party perhaps?
 I really enjoyed making those aviator hats, ski caps, and scarves for the boy

 I just love the long, leafy stems and the yellow seeds on real strawberries. They translate nicely on these sweet caps, I think. I also made matching dual colored scarves in a diamond pattern to match.


 These little guys are pretty novel. I've never made a boy amigurumi before. I've just always loved the floral and frills of outfitting little girls. This time around, however, I wanted to make something a little less frou-frou . . . a lot more casual. Rough and tumble little boys seemed to be the logical answer.
 I opted to outfit this bunny and the bear in aviator hats and scarves.
 Here's a close-up of the aviator hat.
 With chilly weather just around the corner, I decided to dress this bunny boy in a winter earflap hat and matching scarf.
 And what has inspired me to create little amigurumi boys? Well, it may have something to do with the little man above :) Yep, this is the Big Project I've been working on and why I haven't been as quick and crafty as I normally am. I've been quite preoccupied preparing for his arrival. I'm so excited!


 I started out by selecting quality mohair yarns with a wonderful fuzz factor for the little critters. Fuzzier is always better, I think. :) And then for their apron dresses, I chose some lovely fabrics -- a pink embroidered cotton gauze, an imported Liberty of London lawn, and a dainty daisy pique.
 With color coordinating cotton thread, I crocheted a picot lace to go around the edge of the dresses and created a Peter Pan collar at the necklines.
 To top it all off I changed the routine wool felt flower by their ears. After fiddling with a bunch of flower variations, I came up with these crochet puff petal flowers with glass bead centers. I just love how sweet and plump they look.
 Please meet the Willy-Nilly Silly Snake.
 One last thing . . . these softies will be up in the shop soon if anyone is interested.
 Lately, I've been busy whipping up amigurumi that sums up my philosophy on life -- it's all too short, but wonderfully sweet . . . so savor every moment. I'm probably still filled with that fresh and novel feeling you get as you ring in the New Year, but I'm hoping it's something more. I hope this feeling sticks. It's easy to get so bogged down in the minutiae of life that you completely miss it. Not me, though. Not this year (or all the years thereafter hopefully). I resolve that in 2010, I will savor life's sweetness so thoroughly that I'll be choking on it! :)
  These Charming Chocolate Dipped Strawberries were inspired by a long ago trip to Godiva's, where they had chocolate covered everything. Their jumbo chocolate dipped strawberries looked so heavenly that the sight was forever etched in my brain. Unfortunately, my amigurumi version doesn't taste as good, but I hope to make up for that in charm and cuteness.
 Oh, and they're functional, too! I wanted these strawberries to do more than just sit on your desk and smile at you, so I attached a metal snap clip to the back and now you can dangle your strawberry on your bag or use it as a keychain, and take some cuteness with you wherever you go. :)
 Each strawberry comes packaged in these clear plastic bento packages I discovered in my local grocery store. Now they're ready for gift giving!
 Other sweet additions include Very Berry-licious Cupcakes and Cheery Cherry Cupcakes. I wanted to make cupcakes with more scrumptious and elaborate tops.
 So I randomly decorated them with dallops of vanilla frosting, colorful sprinkles, and big fruit pieces. I love how they look from above . . . it's really like looking into a dessert case at the bakery.


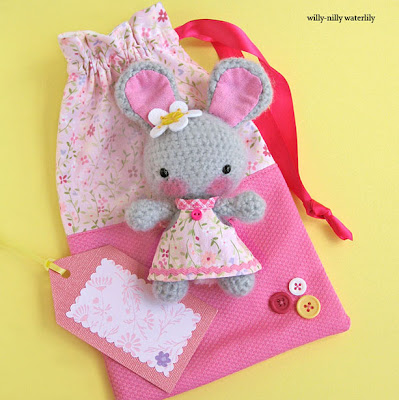


 Some Itty Bitty Ami Bears sitting in their origami gift bags . . .
 And a trio of Bashful Blooming Cacti. Each cactus will now come with an instructional "How to Care for . . . " hang tag. It's an idea that I've been mulling over for ages and I've finally gotten around to doing it.
 The tags read --
 I know, I know . . . they're just potholders, but they're cherry potholders so that's sort of cute, right? But then I discovered some cherry print fabric so I plan to make a whole cherry themed kitchen set. This project is still in the beginning stages so I have hopes that it will blossom into something more impressive than it seems. We'll see, I guess. Stay tuned . . .